
Learning how to configure Neovim can be overwhelming. One way to get started is to install a few pre-built configurations (like LazyVim, NvChad, AstroNvim, LunarVim or the official Neovim Kickstart) and see what you like.
Most installation instructions will tell you to replace everything in your ~/.config/nvim directory with the new configuration. But once you do, you lose the ability to launch Neovim with your previous config.
With that approach, you can only have one Neovim config installed at a time.
But what if you want to compare two configs? Or maintain different configs for different purposes (e.g. one for work and one for personal projects)?
Install each config in its own directory
To be able to use more than one config, you’ll need to make a couple changes to your setup:
- Instead of installing a new configuration in
~/.config/nvim, install it in a custom~/.configsubdirectory - Each time you open Neovim, specify which config you want by setting the
NVIM_APPNAMEenvironment variable in your launch command
For example, assuming you’ve installed LazyVim in ~/.config/nvim-lazyvim, you’d launch it with this command:
$ NVIM_APPNAME=nvim-lazyvim nvimNeovim uses NVIM_APPNAME to determine which config directory to load. If you don’t include it (or set it to an invalid value), Neovim will use the default config in ~/.config/nvim.
Switching configs using alias, select or fzf
Lets assume your ~/.config directory includes these subdirectories:
~/.config
├── nvim-astrovim
│   └── init.lua
├── nvim-kickstart
│   ├── init.lua
│   └── lua
│       ├── custom
│       └── kickstart
├── nvim-lazyvim
│   ├── init.lua
│   └── lua
│       ├── config
│       └── plugins
├── nvim-lunarvim
│   └── config.lua
└── nvim-nvchad
│   ├── init.lua
│   └── lua
│       ├── core
│       ├── custom
│       └── plugins
└── nvim
To quickly open Neovim using each config, you could create an alias for each launch command:
alias v='nvim' # default Neovim config
alias vz='NVIM_APPNAME=nvim-lazyvim nvim' # LazyVim
alias vc='NVIM_APPNAME=nvim-nvchad nvim' # NvChad
alias vk='NVIM_APPNAME=nvim-kickstart nvim' # Kickstart
alias va='NVIM_APPNAME=nvim-astrovim nvim' # AstroVim
alias vl='NVIM_APPNAME=nvim-lunarvim nvim' # LunarVim
Or use select to list your configs so you can choose one:
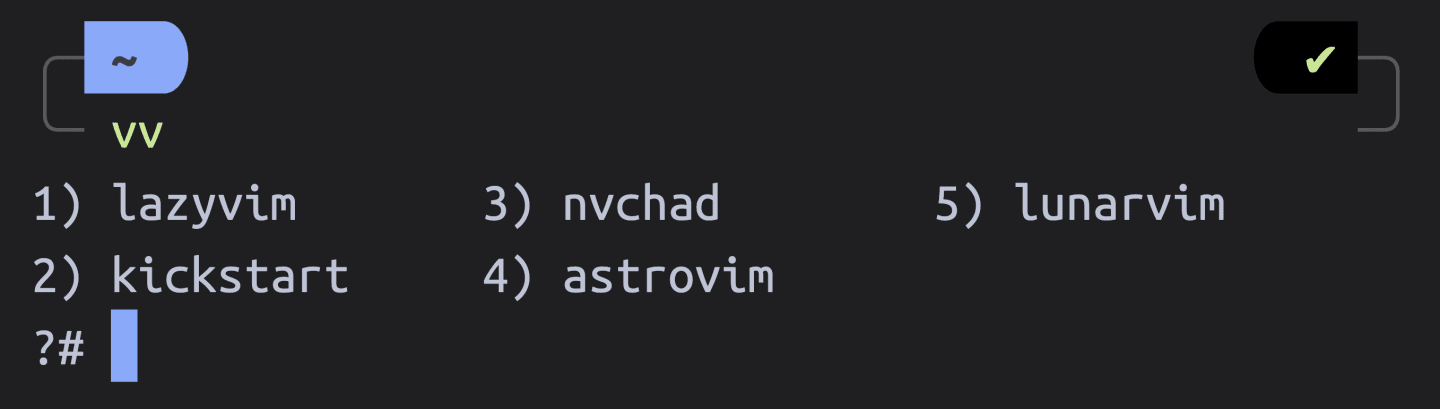
vv() {
  select config in lazyvim kickstart nvchad astrovim lunarvim
  do NVIM_APPNAME=nvim-$config nvim $@; break; done
}
Which would produce a menu like this:
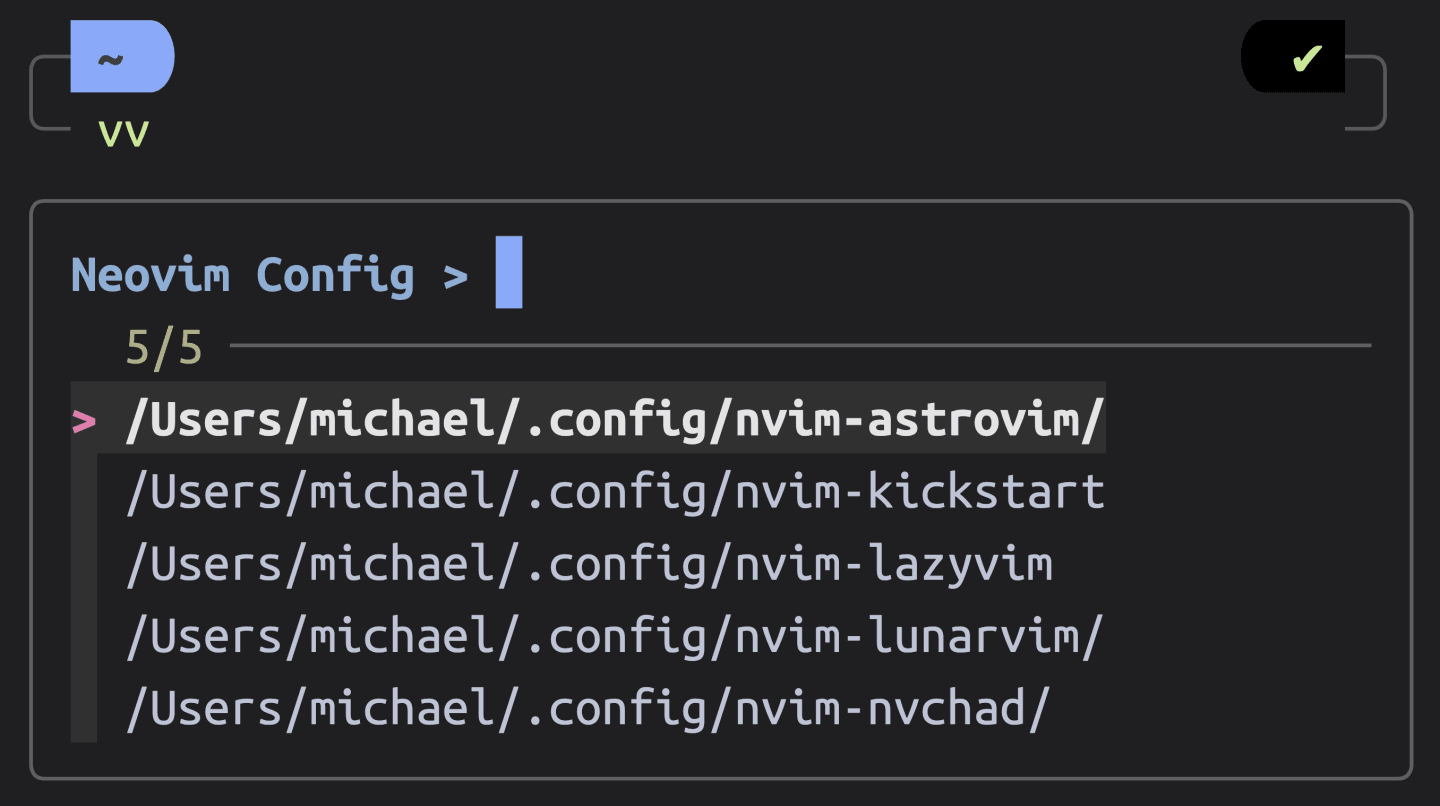
Or you could get fancy and use a fuzzy finder like fzf to do the same thing:
vv() {
  # Assumes all configs exist in directories named ~/.config/nvim-*
  local config=$(fd --max-depth 1 --glob 'nvim-*' ~/.config | fzf --prompt="Neovim Configs > " --height=~50% --layout=reverse --border --exit-0)

  # If I exit fzf without selecting a config, don't open Neovim
  [[ -z $config ]] && echo "No config selected" && return

  # Open Neovim with the selected config
  NVIM_APPNAME=$(basename $config) nvim $@
}Here’s what that fzf menu would look like:
Conclusion
Configuring Neovim can be daunting, but being able to install a few configs and compare them is a great way to gather inspiration for your own custom config.
Good luck!
Further Reading
- NVIM_APPNAME • Neovim docs 📚
- Neovim Config Switcher • Elijah Manor 📺
- Neovim Switcher Gist • Elijah Manor 👩💻
- Lazyman: Neovim Configuration Manager • Ronald Record 🛠️
- You Should Use a Neovim Distro If You Are New • ThePrimeagen 📺